Friday 30 June 2017

Quaker Ridging

            Now I know very little about Quakers other than this dude  who fuels my morning porridge is one (as far as i know he's a random man dressed like a Quaker) this is likely because the number of Quakers in the UK is 17,000 or around 0.0003% of the population, my odds of meeting one are pretty low. Maybe some of you amur'cans know a little more (yes I see you! I have the power of the almighty stats page!) Whomever they are and whatever they are like the Quakers have got one thing going for them:
They named the most changeable knitting stitch in the world.

Seriously half the time the "Quaker Ridging" looks nothing like the original pattern, because it's whole row purl welts across stockinette even the most amateur knitter can change this pattern. You could change the thickness of the welts, change the frequency of the welts change the order of thick or thinner welts, the possibilities my friends are pretty much endless. Also it's a super easy pattern takes no time to knit up at all.

This time around I'm only doing one picture no close up is necessary you'll just see knit and purl stitches, if you want to see that go to my stockinette stitch it's pretty obvious, and if you want to see more of that hot purl welt action look at the escalator stitch.

(Ohh! look you can see my handwriting)
          
Swatch is as follows - 4ply - 2.5mm needles - 30st x 37st - Long tail CON - Surprisingly stretchy COFF
           
            Okay some of the more observant of you may have noticed those metal thingies that are in the corners/ on the edges of all my swatches; they are brads (aka split pins) they hold the swatch in a physical book where I have written the pattern and notes about it, I personally started this because it's nice to touch a physical copy of a stitch as you can get to know it better before using it for a project, anyway back to the brads you may have noticed an extra one in top center, this is because this stitch CURLS. A LOT. Anything you make out of this will need a border and/or blocking to lie flat, this is due to stockinette natural curl being encouraged further by the welts. 
            The pattern is simply a 1 row welt followed by a 3 row welt, the pattern is easily changeable if you want thicker welts increase the number of rows if you want thin knit fewer rows, if you want thick then thin just swap them around. Experiment with it, it's a very easy pattern to change.

Pattern for the specific 1 welt then 3 welt worked flat:
Rows 1,3,5 - *K*
Rows 2 & 4 - *P*
Row 6 - *K*
Rows 7,9,11 - *K*
Rows 8 & 10 - *P*
Row 12 - *K*
Row 13 - *P*
Row 14 - *K*

            Well that was easy to write, and it's just as simple to knit or edit. Also do you see? I finally figured out the title formatting what a bloody nightmare now the archive should work properly and people can navigate the blog easier. Happy Knitting!
Now here's a picture of a Quaker with a cat.


Wednesday 28 June 2017

Waving Rib Pattern

            I tell you what summer telly is garbage, I haven't noticed much as I have netflix and running is a good distraction but now I've finished orange is the new black and it's 20 days until Game of Thrones season 7 premiers I've got nothing to watch while I knit, and I don't want to get into anything big because it's only 20 days! *squealing* Seriously I am a Game of Thrones super-fan I knitted a Game of Thrones blanket last year, (That was my last big project before this madness) annoyingly it's showing in the summer this year so I won't be under it to watch the show :'( also I left it at uni by accident, maybe I'll make the BF get it for me during grad week.
           
The blanket

            Anyway on with the stitches today we've got a cool effect based on how knits and purls interact, the ribs in this stitch are actually knitted completely straight the wave is caused by the purl stitches drawing the ribs in (like in normal ribbing) and the knits pushing them out. The reverse is actually a rather cute looking block stitch arranged like a basket weave.

A very pretty pattern, and it doesn't take long to knit up, it resembles cables close-up

Very similar to honeycomb lattice cables closeup, but is slightly more open and easier to do!

I personally prefer the reverse to the front but I'm a sucker for basket weave, it would make some nice cushion covers.

It's also less dense than traditional basket weave so would make for more flexible items.

Swatch is as follows: 4ply - 2.5mm needles - 32st x 40st - German Twist CON - Surprisingly Stretchy COFF

Pattern for working flat:
CON - multiple of 6st +2
Rows 1 & 3 - P2*K4,P2*
Rows 2 & 4 - K2*P4,K2*
Rows 5 & 7 - K3,P2*K4,P2*K3
Rows 6 & 8 - P3,K2*P4,K2*P3

Pattern for working in the round:
CON - Multiple of 6st +2
Rows 1-4 - P2*K4,P2*
Rows 5-8 - K3,P2*K4,P2*K3

            A double pattern again, where both sides look great and it's super easy to knit up! Especially in the round. Now I have to get back to finding something to watch that isn't daytime tv trash, *sigh* If only it wasn't raining I would run. Well happy Knitting!


Tuesday 27 June 2017

Escalator Pattern

            More purl welts today, I don't know what it is about this pattern everyone I've shown it to says it's great, personally I think it's a bit silly it's just sequential purl welts! Barbra says its "fun", well I'm not sure about that but it certainly is quick to work despite the length of the pattern. and it looks like an escalator, or a set of stairs. Obviously. I'm a bit behind on the knitting at the moment, I've been too busy trying not to be a fat bastard and have started running away from zombies. So if the uploads are less regular that's why. 


 Simple purl welts on a knit background, not much to say about the pattern this week.

Swatch is as follows - 4ply - 2.5mm needles - 32st x 48st - Longtail CON - Surprisingly Stretchy COFF

Pattern for working flat:
CON multiple of 32st
Rows 1 & 3 - *K5, P11*
Row 2 - *K11,P5*
Rows 4 & 6 - *P*
Row 5 - *K*
Row 7 & 9 - P4*K5,P11*K5,P7
Row 8 - K7*P5,K11*P5,K4
Rows 10 & 12 - *P*
Row 11 - *K*
Rows 13 & 15 - P5*K5,P11*K5,P3
Rows 16 & 18 - *P*
Row 17 - *K*
Row 19 & 21 - K1,P11*K5,P11*
Row 20 - P4*K11,P5*
Rows 22 & 24 - *P*
Row 23 *K*

            Phew that's a long pattern! It's not hard once you get into the swing of it if you can "read" your knitting. It also knits up surprisingly quickly. Now I have to go run away from some zombies so, happy knitting!

Sunday 25 June 2017

Ripple Rib Stitch

            And we're back sorry for the break in your regularly scheduled programming, but I just got my laptop back from the chopshop, the steam sale is on and I had some quizzes to attend. So the updates got away from me; we're back now and we've got some nice swatches to do. Oh and remember when I said we were out of broken rib territory? Well that may have been a small accidental lie (Look I forgot about this stitch okay?!). On with the knitting!
            So ripple rib stitch is basically a 2x2 rib that's broken every row, one stitch at a time moving the pattern either left or right.;(depending on the row) this forms alternating diagonal going left and right. It looks a lot like last weeks pattern if you rotated it 90 degrees, but other than appearance the actual patterns have very little in common. It's a pretty good example of how in knitting there can be many ways to do one thing. The stitch is also fully reversible, although the ribs are staggered compared to the front.

The stitch has quite a lot of lateral stretch, so if you aren't a fan of how tight ribbing can be this can be a viable alternative at the bottom of a jumper.

The stitches tend to warp just after or just before they're broken, this gives the ribs an appealing rounded shape.

Swatch is as follows: 4ply -2.5mm needles - 30st x 48st - Long tail CON - Chain COFF

Pattern for working flat:
*because this pattern only uses 4 different rows I've written it slightly differently so i don't have to keep re-writing stuff*
CON - multiple of 4 st

A - *P2, K2*
B - P1* K2,P2*K2,P1
C - K1*P2,K2*P2,K1
D - *K2,P2*

Row 1 - A                                 Row 9 - A
Row 2 - A                                 Row 10 - A
Row 3 - B                                 Row 11 - C
Row 4 - C                                 Row 12 - B
Row 5 - D                                 Row 13 - D
Row 6 - D                                 Row 14 - D     
Row 7 - C                                 Row 15 - B
Row 8 - B                                 Row 16 - C                          

            In the round work as normal 2x2 ribbing for two rows, then stagger stitches left 3, then do an extra row of normal ribbing, then stagger right 3. This is likely the last stitch I'll do a version in the round for. (unless it's obvious) The problem is Barbra doesn't provide patterns in the round so I have to work them out myself and unless I'm going to make a sock out of it, it's probably not worth my time, if someone specifically requests it I will endeavor to figure it out but some of these patterns end up being 20 rows + so it's easy to make an error whilst changing it into in the round. In general in the round just change the even rows knits to purls and purls to knits.
Post complete! Now I can go play some more crusader kings, seriously the steam summer sale is pretty much me throwing money at my laptop. Next time is a pattern lots of people seem to like
but I think is kinda silly, it's an easy one, I promise that's the last of the broken ribs, (I literally just checked through my physical book there aren't any for the foreseeable future) At least until the ribbing section of the book. Happy Knitting!

Thursday 22 June 2017

Ripple Stitch

            First stitch in the book where Barbra doesn't say anything about it so I guess this oe is going to be short and sweet. Technically a series of purl welts changing positions subtly every row. (The guy who put the b in subtle was a clever bastard) It's a pretty long pattern this time around so let's get into it.


Swatch is as follows: 4ply - 2.5mm needles - 30st x 50st - Long Tail CON - Surprisingly Stretchy COFF

            As you can see it's a pretty short pattern it takes nearly as long to work as garter stitch so a slow one this week, combined with the fact that the pattern is a pretty long one I wouldn't personally use it as an overall pattern but it is very nice so it would make nice squares in a blanket.

Pattern working flat:
CON 8st + 6
Row 1 - K6*P2,K6*
Row 2 - K1*P4,K4*P4,K1
Row 3 - P2*K2,P2*
Row 4 - P1*K4,P4*
Row 5 - K2*P2,K6*P2,K2
Row 6 - P6*K2,P6*
Row 7 - P1*K4,P4*K4,P1
Row 8 - K2*P2,K2*
Row 9 - K1*P4,K4*P4,K1
Row 10 - P2*K2,P6*K2,P2

The pattern is the same in the round but on even rows the knits are purls and purls are knits. IE:
Row 2 - P1*K4,P4*K4,P1

Wednesday 21 June 2017

Roman Rib Stitch

            No mysteries around the name this week, this stitch is named as it's a variation on Roman stitch. In this variation the knits and purls are alternated as in Roman Stitch but the rows are in a different order.

Weirdly it has the appearance of a broken rib stitch and technically could be named as one but it's similarity to Roman stitch means they are more often than not found together.

 The overall texture has a corrugated effect
The individual stitches tend to twist here particularly the bottom stitch in a ridge.

The Swatch is as follows: 4ply - 2.5mm needles - 30st x 42st - long tail CON - chain COFF

Pattern for working flat:
CON Even st
Row 1 - *K*
Row 2 - *P*
Rows 3 & 4 - *K1,P1*
Row 5 - *K*
Row 6 - *P*
Rows 7 & 8 - *P1,K1*

Pattern for working in the round:
CON Even at
Rows 1 & 2 - *K*
Rows 3 & 4 - *K1,P1*
Rows 5 & 6 - *K*
Rows 7 & 8 - *P1,K1*

            Well I think that is probably the last of the broken ribs for now but this one is at least interesting given its relation to Roman stitch. Happy Knitting!

Roman Stitch

            The name of this stitch fascinates me, on the one hand there is very little evidence of Romans knitting, or at least in the sense of what we today would call knitting. On the other hand there doesn't seem to be an origin for this stitch as it is very old. Barbra fails to mention anything about the name in the book so I decided to look it up.

            I couldn't​ find why the stitch was named thus; I did however, discover in Rome occupied Egypt there was a practise called nalebinding. It's again hard to say where this craft originates, however it appears to be a form of single needle knitting. Now I suspect that Roman Stitch owes its name to the fact that it has an astonishing similarity to nalebound objects. So even though its roots may not technically be ancient knitting in the traditional sense, it is likely a copy of one of the oldest forms of knitting in the world.

            Now on with the pattern, it's fairly simple, consisting of seed stitch stripes against a stockinette background. The reverse is an interesting recessed purl pattern.


The Swatch is as follows: 4ply - 2.5mm needles - long tail CON - Chain COFF - worked flat

Stitch pattern working flat:
CON Even at
Rows 1 & 3 - *K*
Rows 3 & 4 - *P*
Row 5 - *K1,P1*
Row 6 - *P1,K1*

Pattern worked in the round:
CON Odd at
Rows 1-4 - *K*
Row 5 - *K1,P1*
Row 6 - *P1,K1*

            This stitch is a nice easy one that knits up nice and quickly especially compared to the broken rib patterns we just slogged though so a nice change just as I was getting sick of the broken ribs. Happy Knitting! 😀😀😀

Monday 19 June 2017

Double Broken Rib

            We've reached the end of our broken rib patterns! Sorry for the break in posts, but my laptop is down the chopshop to have the lid repaired, (the top is coming away from the left hinge D:) so I'm posting from my phone for now (which is a bloody nightmare as blogger doesn't properly from at on androids). 


Alright back to the stitch it's basically the same as broken rib but works for a 2x2 rib, and is worked over 4 rows rather than 2. It has a more blocky look than collumny look and the reverse just like in regular broken rib is bobbly on the reverse.
Double Broken Rib overview

Double Broken Rib Closeup

Swatch is as follows: 4ply - 2.5mm needles - 30st x 44st - German loop CON - Surprisingly Stretchy COFF

Only two patterns one for flat one for round.

Working flat: 
CON multiple of 4st +2
Row 1 - Purl all st 
Row 2 - Knit all st 
Row 3 - K2*P2,K2*
Row 4 - P2*K2,P2*

Working round
CON multiple of 4 at
Rows 1 & 2 - Knit all st
Rows 3 & 4 - *K2,P2*

Last broken rib coming up next are some ancient stitches. Happy Knitting!

Friday 16 June 2017

Broken Rib Stitch

            We found the source! The original broken rib pattern (I mean obviously hence the name) Not long now soon we will be out of broken rib mania.
            A very old stitch but still pretty popular works well on jumpers with ribbing at the hems as it continues the ribbing pattern but doesn't have as much stretch. If you're going to use it as a continuation of ribbing for this version of broken rib you have to use it on 1x1 ribbing and make sure the knit stitches align. Double broken rib can be used for 2x2 ribbing but more on that later.

In colour broken rib appears a lot more column-y than in Barbara's Black and white picture. Some of the images in the book look very different from the final colour result, this may be a quirk of the lighting that they were originally taken in.
The columns themselves are also a lot more spread than in regular ribbing as the purl stitches are pulling the knit stitches apart more as they are more frequent than in regular ribbing. More on how purl and knit stitches pull on each other later.


The Swatch is as follows: 4 Ply - 2.5mm needles - 31st x 44st - Double Loop CON - Surprisingly Stretchy COFF - Worked Flat
            Pattern tends to work up quickly, faster than regular ribbing thanks to the plain purl rows for working flat:
CON - Odd st
Row 1 - K1 *P1,K1*
Row 2 - Purl all st

for 2x2 ribbing with a break every other row:
CON - multiple of 4st +2
Row 1 -  K2 *P2,K2*
Row 2 - Purl all st

In the round the patterns are as follows, 1x1 rib:
CON - Even st
Row 1: *P1,K1* OR *K1, P1* (Makes no difference just be consistent)
Row 2: Purl

in the round 2x2 rib:
CON - Multiple of 4st
Row 1: *P2,K2* OR *K2,P2* (Makes no difference just be consistent)
Row 2: Purl

            Wow 4 whole patterns this week, they're all pretty similar just slight adjustments are needed depending on whether you're working flat or round and how wide your ribbing is. You should be able to extrapolate this for even wider sets of ribbing but I doubt you'll use wider than 4x4 ;) Well you lot better get knitting if you want this to get done so off you pop and happy knitting! :)


Thursday 15 June 2017

Sand/Dot Stitch

            Two stitches at once?! A Christmas in June miracle! Well kinda not really, it's just a stitch with a reverse that happens to be another stitch. It is an unusual elongated broken rib pattern, it can be viewed either way, it is more often viewed on the sand side which is the purl side. A hard wearing stitch it's well suited to frequently used sportswear or items for pets. The reverse side is called dot stitch or spot stitch because of the isolated purl bumps. It's a relatively quick knit compared to other broken ribs thanks to the knit row breaks.

Dot/Spot Stitch Overview
Dot stitch bears a strong similarity to stockinette, but doesn't have as much stretch and is also tougher so it's useful for pieces where you want the look of stockinette but need a more hard wearing stitch.
Dot/Spot Stitch Closeup
You can easily see the majority of the pattern in dot stitch is in the knit stitches.
Sand Stitch Overview
This is an overall look at sand stitch it's easy to see it tends to curl horizontally, so it's not one of the broken rib patterns that are suitable for borders.
Sand Stitch Closeup
The appearance of sand stitch is interesting it looks like lots of interconnected hills; it's hard wearing and doesn't take long to knit so is a good overall pattern choice.

The swatch is as follows - 4 Ply - 2.5mm needles -30st x 44st - German Loop CON - Surprisingly Stretchy COFF - Worked flat 

            A two for one, everyone enjoys a freebie, it is worked the same worked flat and in the round so it's likely the easiest and quickest of all the broken rib patterns:
CON - Even st
Rows 1 & 3: Knit all st
Row 2: *K1,P1* 
Row 4: *P1,K1*
                         
                  A nice easy one today, and two for the price of one! Happy Knitting :)


Wednesday 14 June 2017

Double Moss Stitch

            Another broken rib today! We're in the broken rib zone of the Treasuries book right now, I am doing them in order so we may end up in some repetitive areas in the book (obviously you don't have to do them in order) in reality I tend to do 2-3 swatches a day and I'm much further ahead than it seems on the blog (for reference I'm currently on page 25 and this blog is on page 11). Confusingly Barbara calls this one Double Seed stitch, given that it's much closer to moss stitch and she herself says it "should probably be called Double Moss Stitch" so that's what we're going with because it makes sense Dagnamit!


            Right, so double moss stitch despite it's simplicity is a very attractive pattern, it's also slightly less work intensive than other broken rib patterns as it's based off a 2x2 rib, so you're only changing yarn positions every other stitch as opposed to every stitch.

Moss Stitch Overview
 From a distance, double moss appears as a series of lumpy squares.
Moss stitch Closeup
Up close you can easily see the purl nubs and  the knit dips.

Swatch is as follows - 4 Ply - 2.5mm needles - 32st x 52st - Double Loop CON - Surprisingly Stretchy COFF - worked flat
As said earlier very similar to moss stitch but the base for the broken rib is a 2x2 ribbing instead of a 1x1
CON multiple of 4 st
Rows 1 & 2: *K2,P2*
Rows 3 & 4: *P2,K2*

As before working in the round is exactly the same (still CON multiple of 4st) but the break happens on rows 1 and 3 instead of 2 and 4.
Pretty similar to yesterday, so this swatch should be a pinch for all! Happy Knitting :)

Tuesday 13 June 2017

Moss Stitch

            Seed stitches long lost twin. Or maybe seed stitch is the lost one given moss stitch is so often confused with it! This is probably down to the fact that we Brits called seed stitch moss stitch first and american moss stitch, double moss stitch. This caused further confusion when talking about american double moss stitch. So to avoid any confusion we're using the american name scheme which is far less confusing. This stitch is called moss stitch the previous stitch is seed stitch and the next one is double seed/moss stitch. If you see British moss stitch anywhere that's actually seed stitch and American moss stitch is moss stitch. Easy right?! :S
            I tell you sometimes knitting names schemes are as bad as Tolkien, between Fingol, Fingolfin and Finarfin no wonder no one reads the Simarillion.

UM element of confusion
           
            Right confusion name schemes aside, moss stitch is probably the most popular or commonly used broken rib pattern. But wait! I hear you cry. What is a broken rib pattern?! It is a pattern that uses a rib-type pattern as it's base (ie 1x1 ribbing is k1,p1) and then intentionally "breaks" the pattern either by offsetting a row or two or putting in rows that have nothing to do with the original ribbing pattern simple right?
            Most basic broken ribs tend to shift a row over by one or two this creates little purl bumps as you end up with purls over knits and knits over purls (as in seed stitch) Moss stitch is a more elongated version of this most basic break introducing it a row later and keeping it a row longer, meaning the knit stitches take more prominence compared to seed stitch where the purl nubs are the star of the show.
            Moss stitch like it's sister stitch is a pretty labor intensive stitch as you have to switch yarn positions every stitch meaning it can take a while to knit up although it again has a pleasing and reversible texture ideal to borders (plus there are still nubs!)

Moss stitch overall

An overview of moss stitch as you can see it's much less dense than seed stitch.

Moss stitch close up

A closeup of moss stitch, you can see the individual broken ribs in the knit stitches here (2 V's lined up close together)

Swatch is as follows: 4 Ply -2.5mm needles - 30st x 40 st - double loop CON - Surprisingly Stretchy COFF - Worked flat

Moss stitch is the same as seed stitch but the swap happens every other row
CON EVEN number of st
Rows 1 & 2: *K1,P1* 
Rows 3 & 4: *P1,K1*

It is worked exactly the same in the round (on even st) but the swap happens after rows 1 & 3 instead of 2 & 4. More broken rib patterns next time! If you know how to cable these are all great for pointing up cables! Or if you're mad knit something completely out of it to have a reversible object. Happy knitting! Oh and since I missed it (was too busy knitting funnily enough) Happy World Wide knit in public day!

World Wide knit in public day

Seed Stitch

            My mum likes this one (she said she likes the little nubs). Often confused with moss stitch seed stitch is the densest and simplest broken rib, It's a naturally flat fabric. It gets it's name from it's nubby texture as the purl bumps look like scattered seeds. It is more complicated than the last two stitches, garter and stockinette, and can take a long time to knit up (I made a scarf completely in seed stitch once it took for bloody ever) and errors in the pattern can take a while to show so going slow has it's advantages. It is however a great choice for borders as it is both reversible and flat.

Seed stitch overall

Overall view of seed stitch (lots of little nubs!)

Seed Stitch Closeup
Closeup on individual stitches, they kinda look like an x with a bar through them.
The swatch is as follows:
4Ply Wool - 2.5mm needles - 30st x 50st - Long tail CON - Chain COFF - Worked flat.

It is a relatively simple pattern despite it's complex appearance it only needs knit and purl stitches.
There are two rows when worked flat:

CON an Even number of st
Row 1: *K1, P1* repeat inside ** until end of row
Row 2: *P1, K1*

            In the round it is worked the same but it needs to be done on an ODD number of stitches, it can be done on an even number but you have to adjust the second row to *P1,K1* and you end up with the first and last stitches forming a 2x2 rib. An unusual stitch to be sure but a very nice texture people often use it in cable work to point- up the cables, I personally love the look of this stitch but think it's a PITA to knit in large amounts there are others that look similar but knit up quicker so I normally go for those but more on that later ;) Good luck knitting!

Knitting Cat

Saturday 10 June 2017

Stockinette Stitch

            After a long night of electing and knitting we've ended up with a hung parliament (huzzah no Tory majority) and I've ended up with 4 completed swatches thank you david dimbleby for being my knitting/ election entertainment. The next basic stitch is stockinette stitch also known as the plain sweater stitch this is often the first stitch people learn when knitting, this stitch unlike garter stitch is not the same on both sides. On the RS of the work the stitches form interlocking V's on the reverse or the purl side the fabric resembles a tighter garter stitch. Also unlike garter stitch the fabric has a tendency to curl when worked flat (not so much in the round).


Stockinette Stitch Closeup
  Above is a close up on the stitches where you can see the clear V shape at the top the stitches are crossed at the bottom the stitches are knit and purled normally.

Stockinette Stitch Overall

The above image shows 3 forms of stockinette stitch, plain, crossed, and twisted (in order from the bottom up the red box shows the change in stitches) as you can see the fabric tends to curl inwards (see the curved red line).

Swatch is as follows: 4 Ply Wool - 2.5mm Needles - 30st by 60 rows worked flat - Chain COFF- Double Loop CON
             Plain stockinette is almost as easy as garter stitch it is simply 2 rows:
row 1: K all st
row 2: P all st
             Crossed stockinette makes an appealing and unusual texture compared to regular stockinette and is achieved by twisting the stitches on every other row, this stitch is possibly the original stitch as twisting your stitches is automatic if you use the Arabic method of knitting the oldest form of knitting. It can be done one of two ways:
row 1: Ktbl all st                                                OR                                      row 1: K all st
row 2: P all st                                                                                                 row 2: Ptbl all st
             Twisted stockinette has less lateral stretch than plain stockinette it is also more sturdy so it's useful for things that need to take more wear and tear like sock heels. It's achieved by twisting all the stitches
row 1: Ktbl all st
row 2: Ptbl all st

That's todays stitch! Phew that was a long one! now go knit!

Knit all the Things!

Wednesday 7 June 2017

A Quick Point about Ends

            It just occurred to me that in the absolute basics I never covered in how to deal with your tail ends, weaving in an end isn't hard to do but it is necessary if you want to get rid of those pesky tails I guess this is another "thing you have to learn" but I totally forgot to put it in the basics, an edit has been put in so you won't miss out, it is now in the list of videos in absolute basics. I've also added a crochet hook to the extras list in case you really care about weaving in ends (or do what I do and just snip it when it's short enough) So check back to that :)


Garter Stitch

            Well here we go first swatches, Garter stitch is the most basic of all stitches it can be made either by simply knitting all your stitches or purling all your stitches whichever you prefer, I made 2 swatches on this stitch type and this one is likely to be the only one where that's the case, it's mostly to see the size difference between 4 ply and DK wool.
Garter Stitch


(sorry about the picture quality currently on a train and the lighting is TERRIBLE :O)
The more observant of you out there may have noticed the cock-up in the middle of the white swatch that is where I dropped a stitch and had to save it without the aid of a chrochet hook so the repair is sadly wonky :(
The swatches are as follows:
Blue swatch - DK Wool - 4.5mm needles - 25st x 45 rows - German Loop CO - Chain Cast Off
White swatch - 4ply - 2.5mm needles - 30st x 52 rows - double loop CO - Chain Cast Off

Garter stitch is a pretty flat stitch it doesn't tend to curl at all however it can look a little lumpy with uneven tension (as is more evident in finer wool) over large areas, The stitch definitely benefits from blocking because of this. The flatness of the stitch lends itself nicely to borders. To work in the round you first knit one row then purl one row. It is a very short stitch, it takes a lot of rows to gain distance so it tends to knit up rather slowly as its actually a series of gathering horizontal welts.

So I guess that's today's stitch Garter stitch super easy! Good luck get knitting :)


Tuesday 6 June 2017

Abbreviations!

            What do they mean? Why do some people use different letters for the same thing? Why is no one upset that Gandalf abandoned the party to kill a secret boss for the XP and loot? Some of these questions will remain a mystery others are pretty easy to answer. I will be using the following abbreviations I will not deviate and if I do I will be killed by the Balrog so this page is the master page for the patterns if you see an abbreviation you don't understand look here! *this page may have to be updated later on*


K - Knit (covered in absolute basics)
P - Purl (covered in absolute basics)
St - a stitch
CO - Cast On (covered in absolute basics)
*Instructions* - repeat instructions inside ** until either you; reach the end of the row or there aren't enough stitches to do a repeat.
K2tog - knit two stitches together as one stitch
P2tog - purl two stitches together as one stitch
B - work through the back loop of the stitch (Ie k1b knit one stitch through the back loop)
Sl - Slip, pass one stitch to the right needle without working it
Sl-st -Slipped stitch, a stitched that was slipped previously
PssO- Pass slipped stitch over (this will have a post probably)
SSK - Slip Slip Knit (a decrease again will have a post)
Knitwise - perform the action as if knitting (left to right)
Purlwise - perform action as if purling (right to left)
Wyif- With Yarn in Front hold the yarn in front of the work as if to purl
Wyib - With Yarn in Back hold the yarn in the back of the work as if to knit
YO - Yarn Over put the yarn over the needle (will probably have a post)
RS - right side of work
WS - wrong side of work
C*F- Cable Forward * number of st
C*B - Cable Back * number of st

             A few other things to note Gauge and Tension mean the same thing as do Cast off and Bind off, I will likely use tension and Cast off but to avoid any confusion here it is.


Cartoon Balrog

The Absolute Basics

            Alright we've made it first post good work. In order to knit we'll need some fairly obvious things. Our chief weapon is surprise...surprise and fear...fear and surprise.... Our two weapons are fear and surprise...and ruthless efficiency.... Our *three* weapons are fear, surprise, and ruthless efficiency...and an almost fanatical devotion to the Pope.... Our *four*...no... *Amongst* our weapons.... Amongst our weaponry...are such elements as fear, surprise.... I'll come in again.
        
Monty Python Spanish Inquisition

Things To buy:

         You'll need a few things if you want to knit along so I thought I'd make a nice easy list first things are things you need to buy. I know, I know money urgh spending but this is literally the bare minimum for the most basic stitches:
                          
                            Knitting Needles
                            Some Yarn
                            Scissors
                            A Darning/Tapestry needle

           Pretty short list hooray! Right so the Needles are up to you (obviously) I personally use aluminium needles because I'm a tight knitter so i need the extra slip and I tend to leave Needles on the sofa where they get sat on and bent so glass needles or ivory aren't an option, I also like the extra weight. If you're a looser knitter it may be a good idea to get bamboo needles as they tend to be more grippy as do some plastics, test them out a bit on some basic stitches to get the idea of what you prefer. Size wise I would try and go for 4.5mm-5mm size needles to start as they are a good size for DK yarn which is the most easily accessible and isn't too small or big.
          Yarn again is down to personal preference, I'm a cheapo so I'll dive in bargin bins as much as possible but I also tend to try and avoid 100% acrylic yarn as it makes my hands itchy, all the swatches I'm knitting up are 4 ply on 2.5mm needles as i'm putting the physical copies into a book and the smaller swatches fit better but DK wool (aka 6 ply) and 5ply should service absolute beginners well.
          Scissors, get sharp clean ones.
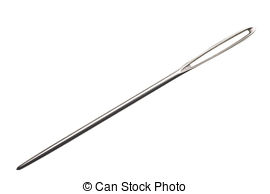
          A Darning needle is probably the most unusual item on the list this is to weave in ends and it isn't strictly necessary but if you're doing swatches you'll want to get rid of your tails. The image below is an example but it can be made out of plastic, blunt ones are better for knitting.
Darning/ Tpestry Needle

Things to learn:

      I'm going to link to videos here as it's the real basics and its easier to convey as videos there are plenty of videos of this stuff. You'll need to know how to do only six things for the first swatches so it's easy enough to learn, you need to be able to:

make a Slip Knot
Cast On (Pick any of these Thumb Method, Long Tail (With SK), German Twisted)
Cast Off (Pick any of these ChainSurprisingly Stretchy)
Weave in Ends

         Casting on for those of you who are tighter knitters I would suggest long tail or thumb as it makes a looser edge and for looser knitters German twisted is pretty and sturdy. With casting off looser or regular knitters should be fine with plain old chain, tighter knitters will prefer the surprisingly stretchy cast off (I know I do) you do have to learn how to yarn over but that is covered in the video.
         Weaving in the ends may be easy or difficult depending on the pattern the video goes over the proper technique but as long as you cant see the yarn in the end it doesnt matter too much, remember to leave enough yarn when casting on/off.

Other useful Stuff:

          There are some other things that will make knitting a lot easier in terms of RSI and keeping track of rows here are my suggestions, 
           For row tracking either get out your phone and use a notepad app and write down either the row you just started or the row you just finished, as long as you're consistent it doesn't matter you'll never be lost in a pattern, eventually you learn to "read" your knitting so it wont be as necessary (telling stitches apart by looks basically but its basically a skill you develop via knitting a lot)but its a lifesaver on larger projects too a pen and paper can do the same job just don't lose it! A phone also lets you look at a pattern if it's complex but again you can print it out or write it out either is fine.

           A Crochet hook is useful for picking up dropped stitches and weaving in your ends. Try and use one smaller than your knitting needles if you are only using them for this.
      
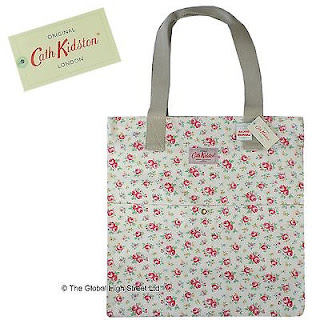
           Some sort of bag to put your knitting stuff in is pretty essential if you're going to have more than one ball of wool it makes it firstly mobile so you can take it on the bus/to the beach/ out of your house secondly keeps it off the dirty floor (I live in a student house the floor is gross no matter what) and thirdly means you wont loose small stuff like needles. A tightly woven canvas bag is good as the needles are less likely to puncture it and you can chuck it in the wash occasionally and get rid of the lint in the bottom. This is my bag (although mine is grubbier after years of use).
Cath Kidson Canvas Bag

           It would also probably be prudent for me to post a link to the books this whole project is based off here, there are 4, I currently have access to 3 I need to buy the third book still but books 1 and two should serve me well for a long time yet. They are all by Barbara G. Walker they are very old book but they are a very complete list of all knitting stitches they are however in black and white hence me attempting to do a colour copy of all the stitches. Plus I want to have physical copies of all of them as texture is important in knitting. In Order the books are:
A Treasury of Knitting Patterns
A Second Treasury of Knitting Patterns
Charted Knitting Designs
A Fourth Treasury of Knitting Patterns
            I tend to watch or listen to videos/ netflix/ radio/ podcasts whilst knitting to keep my brain active, after a while knitting happens on autopilot so having things on in the background is nice. Nothing can beat a nice cuppa whilst knitting and watching the latest episode of a game of thrones. Knitting is relaxing find where you like to do it and go! :)
          That is the absolute basics covered next post will be abbreviations and then onto swatches!
If you've never knit before i would 100% recommend practising see if you can do a simple square or two. 
Knitting needles